Deploy Spring Boot App on AWS
January 24, 2025
I want to figure out how to deploy a spring boot app on AWS. I want to do this process correctly, using containers, proper secrets management, and a proper CI/CD pipeline.
Initial Spring Boot App
To start I’m going to create a very simple app using Spring Initializr to generate a basic project structure.
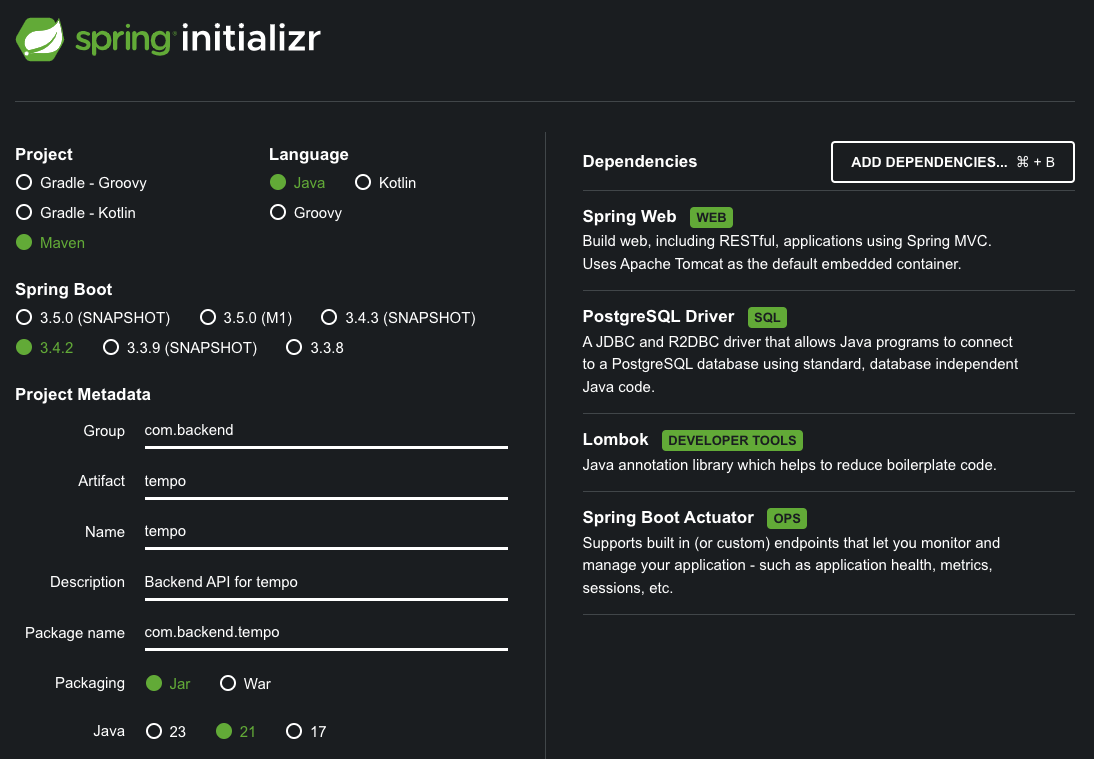
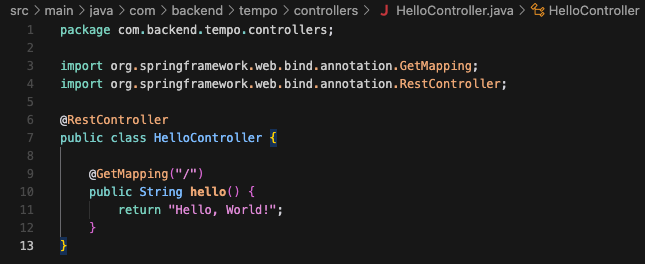
Simple REST controller that responds to HTTP requests.
Need to make sure that Maven will create a JAR file. In the pom.xml file, I need to make sure that the packaging is set to JAR.
<packaging>jar</packaging>
Now we can create a JAR file by running the following command in the terminal:
./mvnw clean install
./mvnwcalls the Maven wrapper script.cleancleans the project directory by removing all files created by previous builds.installcompiles the project, runs any tests, and packages it into a JAR file located in the target directory. It also installs the JAR file into the local Maven repository.
Containerize the Spring Boot App
Next we want to containerize the spring boot app using Docker.
First need to understand how to use docker to create a container.
Docker is a platform that allows you to build, package and run applications in an isolated enviroment, ie a container.
Let’s create a simple Dockerfile.
# Start with a base image containing Java runtime
FROM openjdk:21-jdk-slim

# Add the application's jar to the image
COPY target/tempo-0.0.1-SNAPSHOT.jar tempo-0.0.1-SNAPSHOT.jar

# Command to execute the application
ENTRYPOINT ["java", "-jar", "tempo-0.0.1-SNAPSHOT.jar"]
To build the image, run the following command:
docker build -t tempo-app .
The above command builds a Docker image named “tempo-app” using the Dockerfile in the current directory (.).
To run the container, run the following command:
docker run -p 8080:8080 tempo-app
The above command:
- Creates and starts a container from the tempo-app image
- Maps port 8080 from the container to port 8080 on your host machine
- Your Spring Boot application will be accessible at http://localhost:8080
To run the container in detached mode, run the following command:
docker run -d -p 8080:8080 tempo-app
To list all running containers, run the following command:
docker ps
To list all containers, run the following command:
docker ps -a
To stop a running container, run the following command:
docker stop <container_id>
To remove a container, run the following command:
docker rm <container_id>
For more info: 3 Ways to Dockerize Spring Boot
Deploying to AWS ECR
There are many ways to deploy a container to AWS as listed here The 17 Ways to Run Containers on AWS.
First I will push the container to a registry, namely AWS ECR, so that AWS has access to it.
One big issue I am having with AWS in general is issues with credentials. I don’t feel like creating IAM users and roles and such. So I will run everything in the AWS cloud shell.
First I create a container registry in AWS ECR:
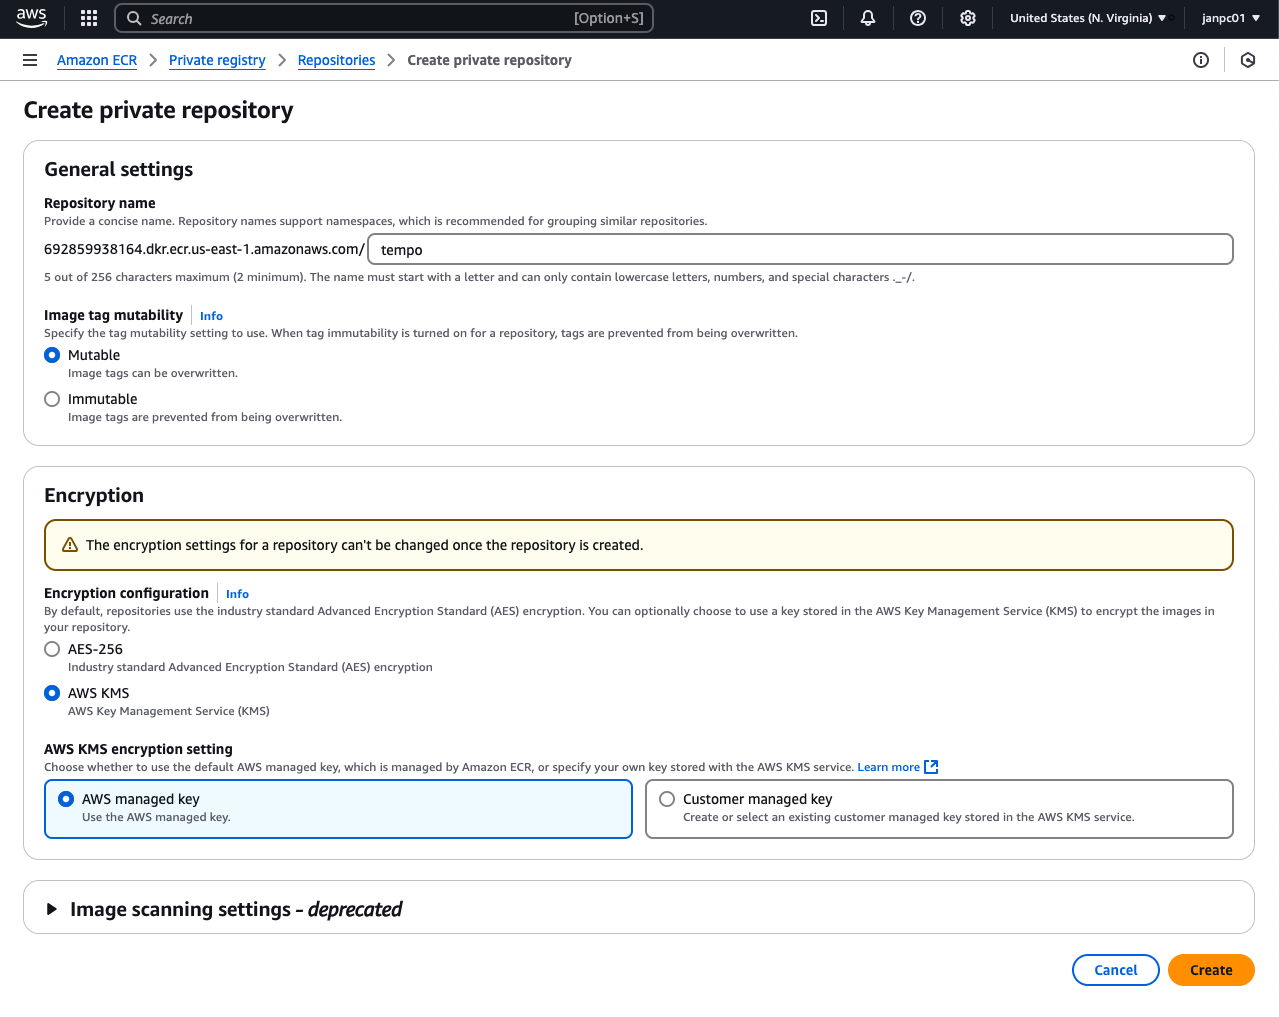
And then I select the repository and click “Push commands”.
This will show a list of commands to run in the cloud shell.
The first command is to login to the ECR registry.
After this we have to upload our project to the cloud shell, which we do by clicking Actions and then “Upload files”. Make sure to zip your project first, upload the zip file, and then unzip it with unzip <filename>.zip. After that cd into your project directory and you can run the rest of the commands.
And now you have a container in ECR!
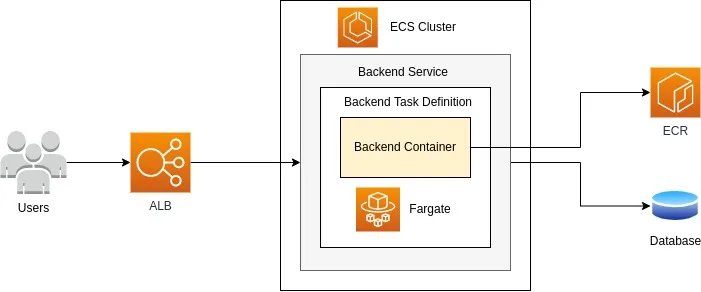
Deploying to AWS ECS
Now I want to deploy the container to AWS ECS. ECS is a container orchestration service that allows you to deploy, scale, and manage containers in a cluster. A cluster is a grouping of resources that create an environment for tasks (containers) to run in.
ECS has two launch types:
- EC2: Launch your tasks on EC2 instances.
- Fargate: Launch your tasks on AWS Fargate, which is a serverless compute engine that allows you to run containers without having to manage servers.
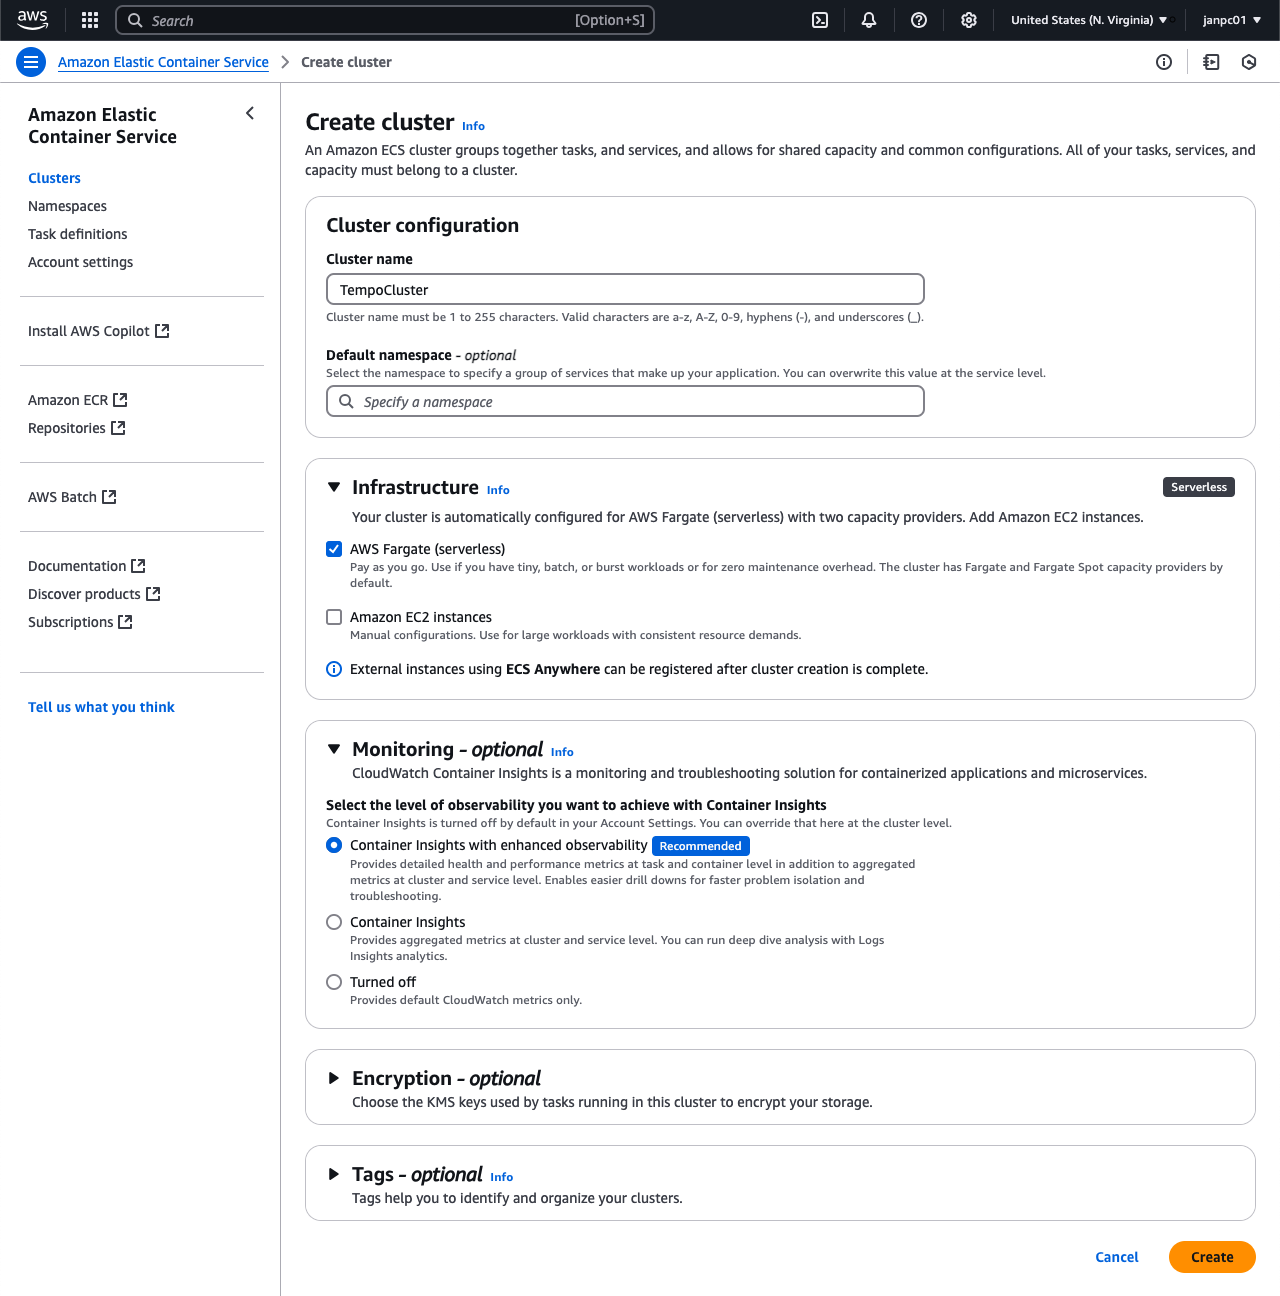
Let’s use Fargate.
First we need to create a ECS service-linked role. Using the AWS Management Console:
- Go to the IAM Console.
- In the left menu, click Roles → Create role.
- Choose AWS Service → Elastic Container Service.
- Select Elastic Container Service use case.
- Follow the prompts to create the role.
Now we can create a cluster on AWS ECS Console.
Next we create a task definition.
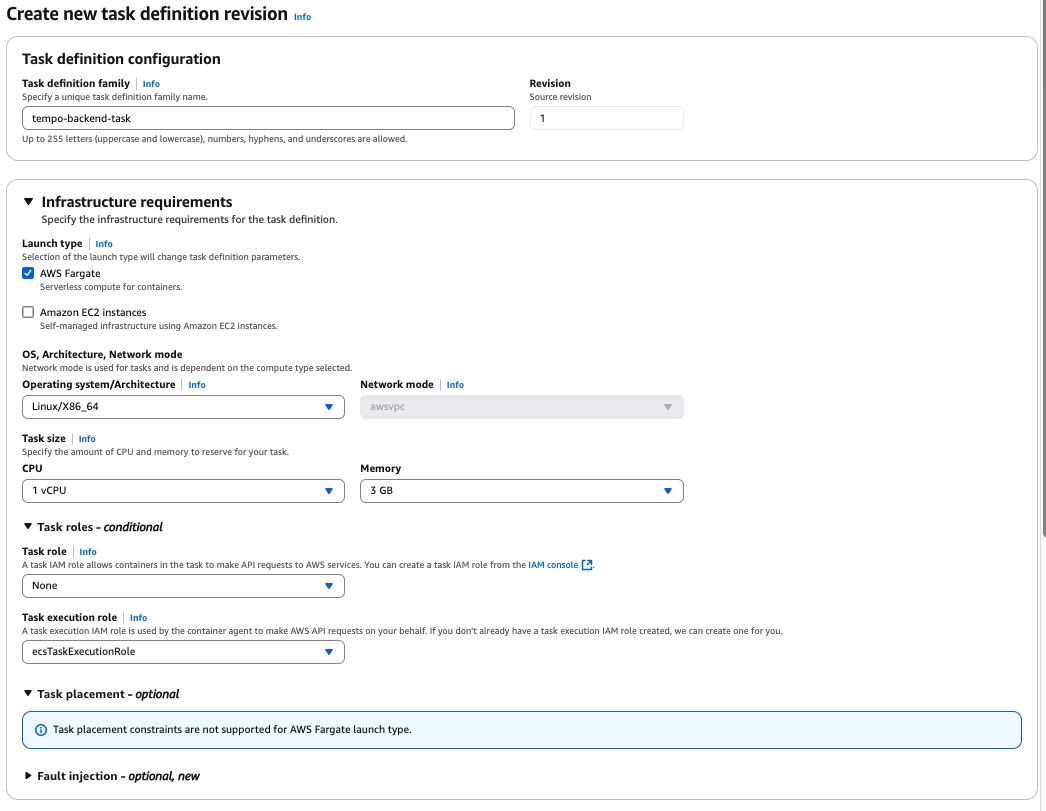
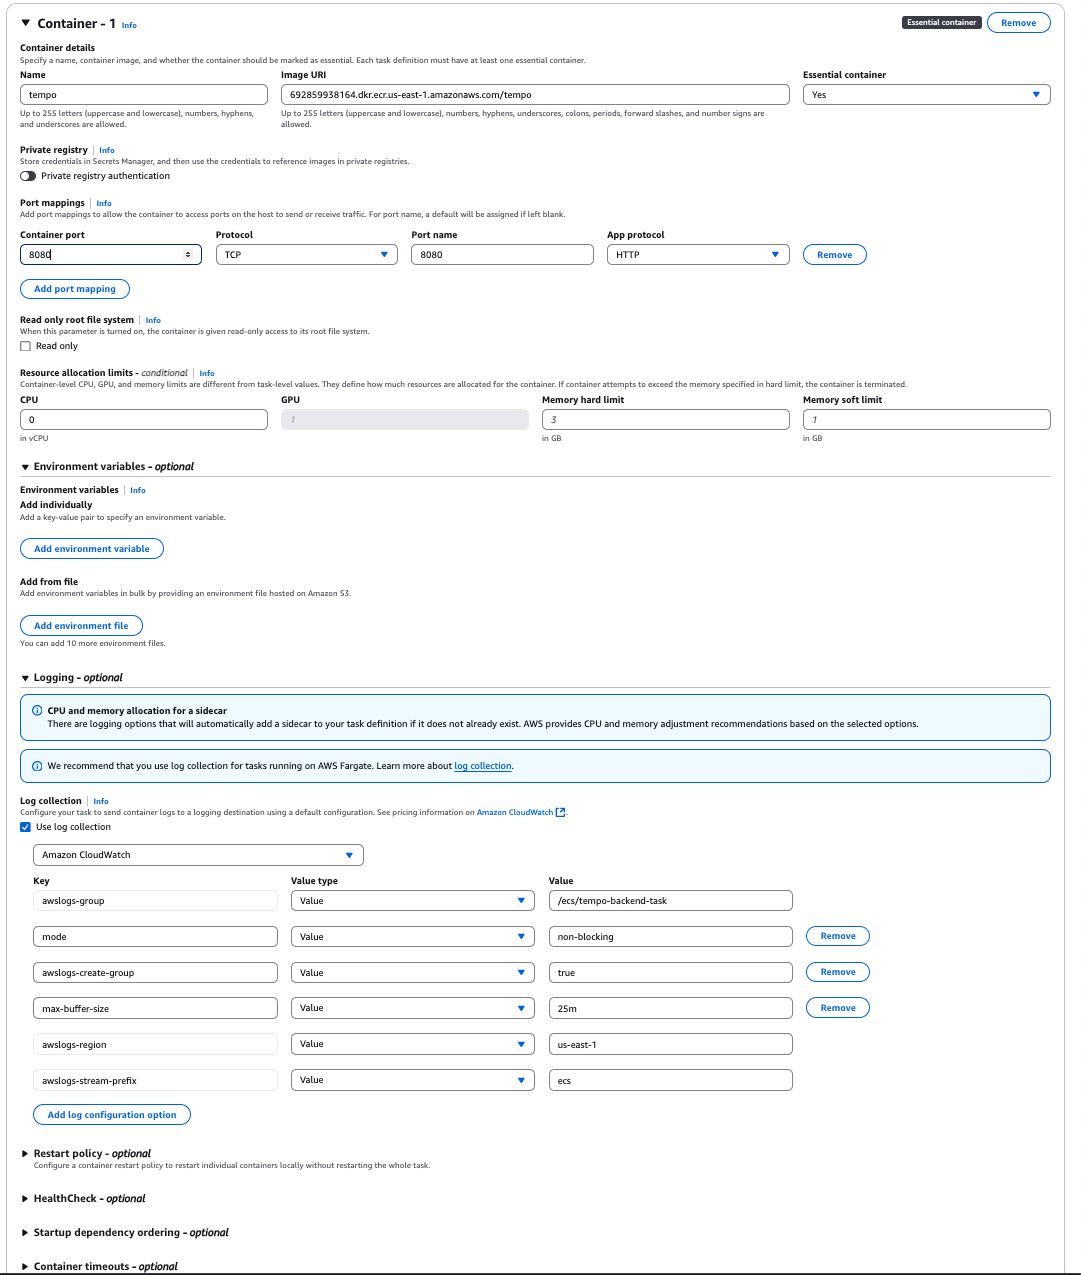
And finally we create a service.
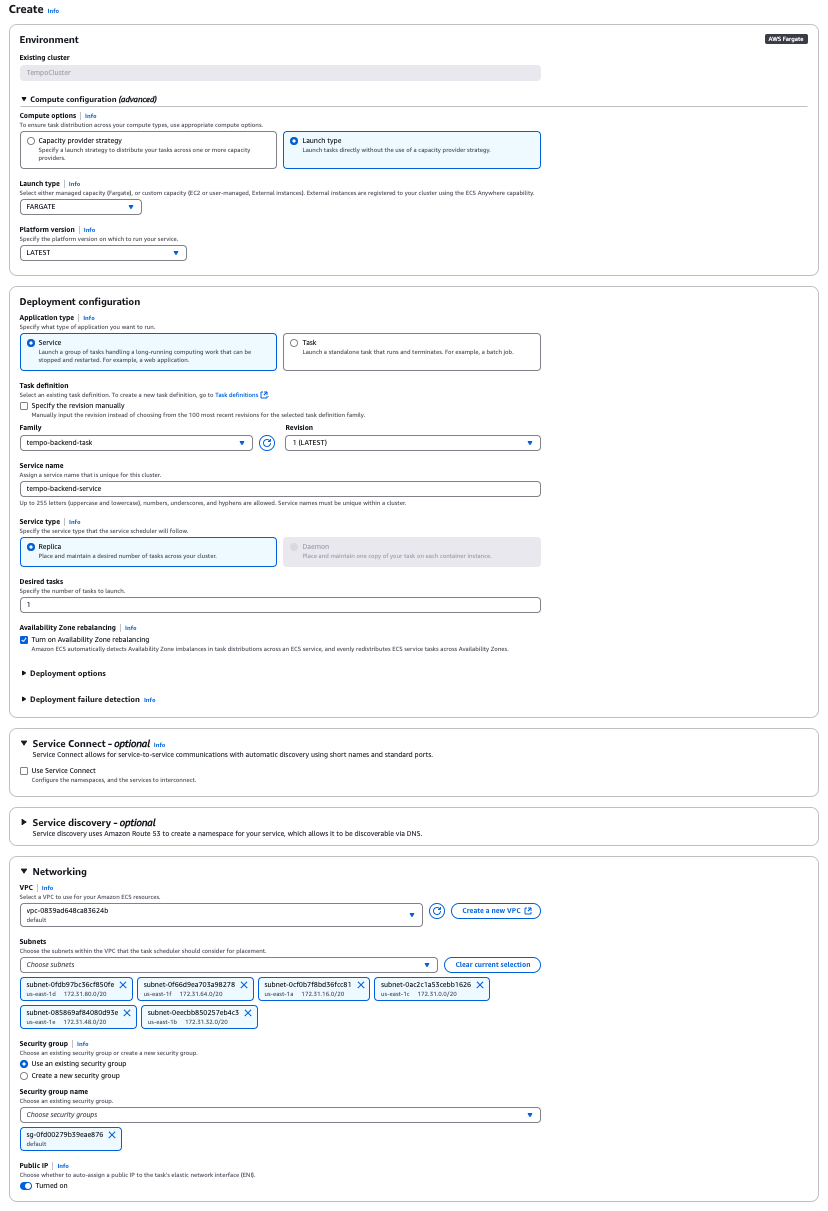
You may have to create a security group for the service.
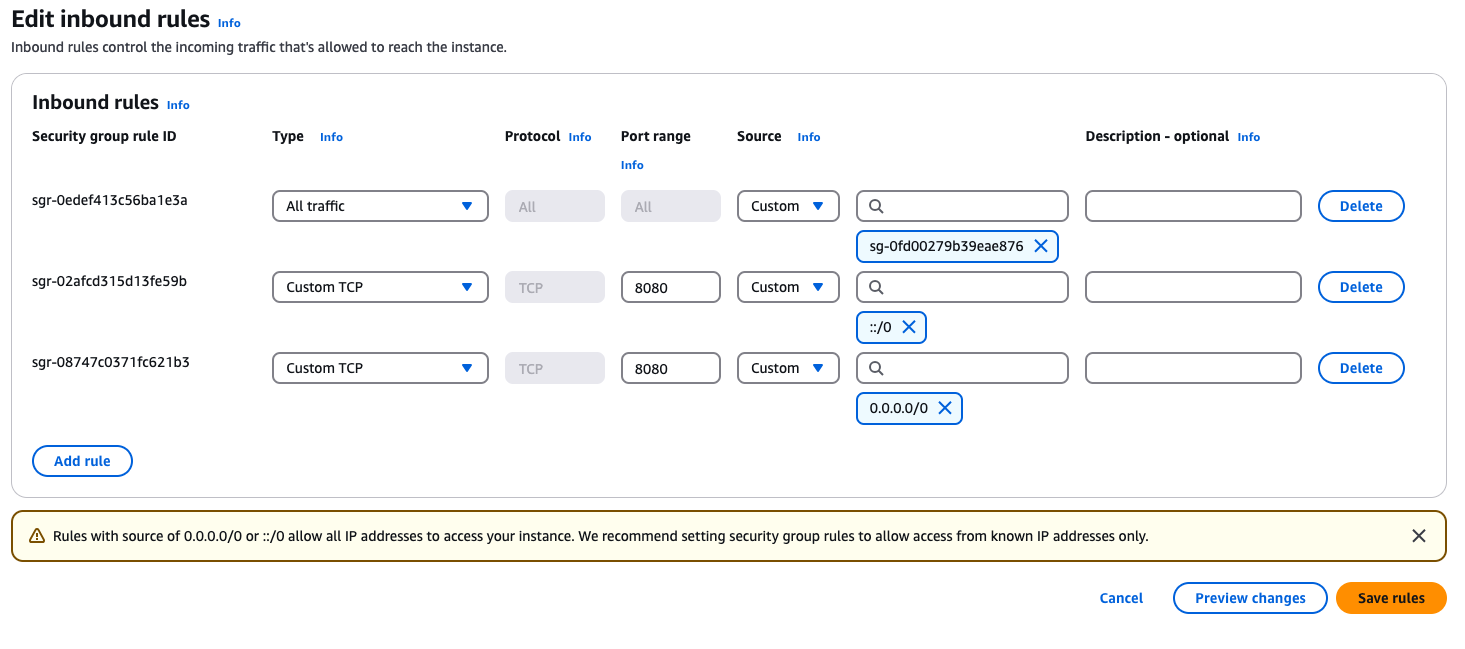
Go to VPC Console and create a security group.
Click on the default Security group ID and then click “Edit inbound rules”.
Add 2 rules, one for IP version 4 and one for IP version 6.
Give it some time for the service to deploy successfully.
Select the service you created.
Move to the Tasks tab and click on one of the running tasks.
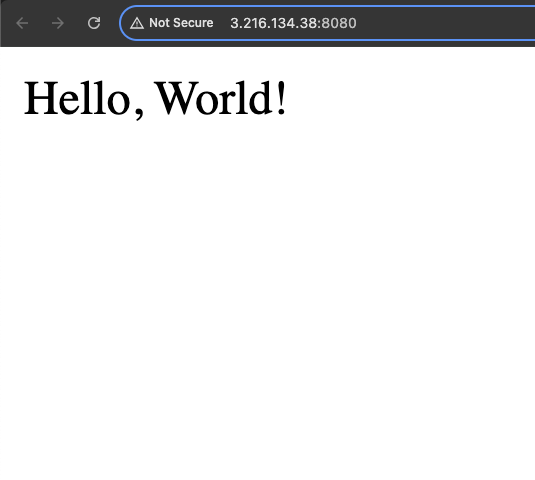
Copy the ip address and paste it in a browser. Add the port number to the ip address.
You should see this:

Some decent info here: Deploying a container with Amazon ECS.
Deploy a Spring Boot application to AWS ECS
January 25, 2025
Deploying to AWS ECS with GitHub Actions
Resources:
Next I want to set up a CI/CD pipeline with GitHub Actions.
First we need to generate AWS credentials.
- Log in to AWS Management Console Go to the IAM Console.
- Select Your User Click on Users in the left sidebar. Select the IAM user for which you want the access keys.
- Manage Access Keys In the User details page, go to the Security credentials tab. Scroll down to the Access keys section.
- Create a New Access Key
If no access keys exist:
- Click Create access key.
- Choose the access key type:
- Command Line Interface (CLI), SDK, and API.
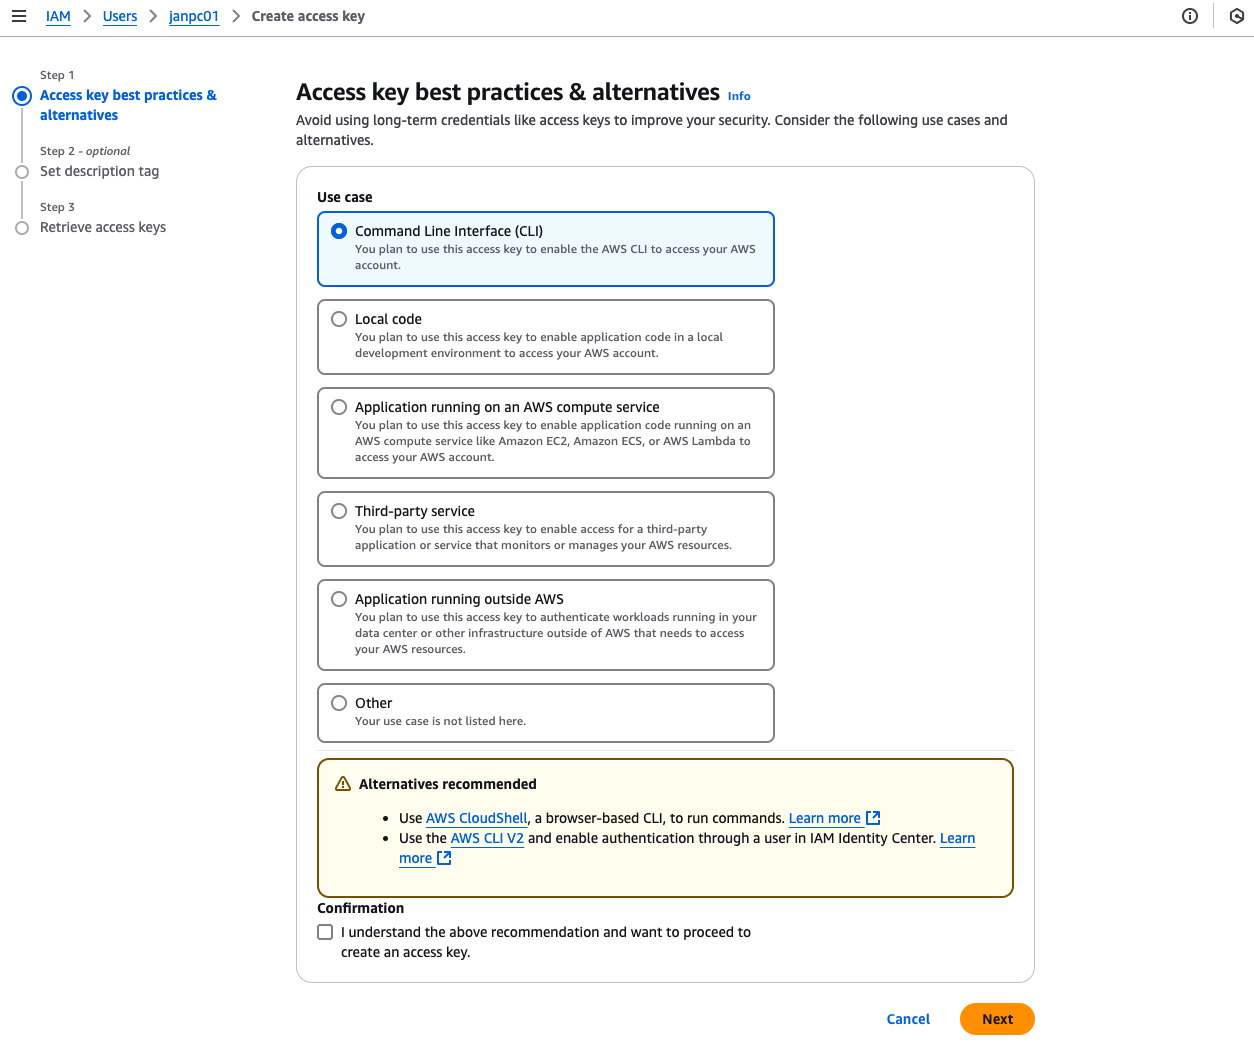
- Click Create access key.
- Click Next, then Create.
- Download the .csv file with your Access Key ID and Secret Access Key.
- If an access key already exists but is inactive:
- Reactivate it by clicking the Activate button.
Now we can create a .github/workflows/aws.yml file in our github repository.
name: Deploy to Amazon ECS

on:
  push:
    branches:
      - main

env:
  AWS_REGION: us-east-1 # set this to your region
  ECR_REPOSITORY: tempo # set this to your repository name

jobs:
  deploy:
    name: Deploy
    runs-on: ubuntu-latest
    environment: development # this might have to be "production"

    steps:
      - name: Checkout
        uses: actions/checkout@v4

      - name: Set up JDK 21
        uses: actions/setup-java@v3
        with:
          distribution: 'temurin'
          java-version: '21'

      - name: Cache Maven dependencies
        uses: actions/cache@v3
        with:
          path: ~/.m2
          key: $-m2-$
          restore-keys: |
            $-m2

      - name: Build with Maven
        run: mvn clean package -DskipTests

      - name: Configure AWS credentials
        uses: aws-actions/configure-aws-credentials@0e613a0980cbf65ed5b322eb7a1e075d28913a83
        with:
          aws-access-key-id: $
          aws-secret-access-key: $
          aws-region: $

      - name: Login to Amazon ECR
        id: login-ecr
        uses: aws-actions/amazon-ecr-login@62f4f872db3836360b72999f4b87f1ff13310f3a

      - name: Build, tag, and push image to Amazon ECR
        id: build-image
        env:
          ECR_REGISTRY: $
          IMAGE_TAG: $
        run: |
          # Build a docker container and
          # push it to ECR so that it can
          # be deployed to ECS.
          docker build -t $ECR_REGISTRY/$ECR_REPOSITORY:$IMAGE_TAG .
          docker push $ECR_REGISTRY/$ECR_REPOSITORY:$IMAGE_TAG
          echo "image=$ECR_REGISTRY/$ECR_REPOSITORY:$IMAGE_TAG" >> $GITHUB_OUTPUT
Now we can commit and push our changes to the repository. You can check in the ECR registry to confirm the image is there.
Next we can go to our ECS cluster, go to task definitions and click on the running task. Go to the JSON tab and copy the task definition. In our gihub repository we need to add a file called .aws/task-definition.json and paste the task definition into it.
Now in the .github/workflows/aws.yml file we need can update the env variables:
  env:
  AWS_REGION: us-east-1
  ECR_REPOSITORY: tempo
  ECS_SERVICE: tempo-backend-service             # name of the service
  ECS_CLUSTER: TempoCluster                      # name of the cluster
  ECS_TASK_DEFINITION: .aws/task-definition.json # path of the JSON task definition
  CONTAINER_NAME: "tempo"                        # name of the container name in the task definition
Then add the final jobs at the very end of the workflow.
       - name: Fill in the new image ID in the Amazon ECS task definition
        id: task-def
        uses: aws-actions/amazon-ecs-render-task-definition@c804dfbdd57f713b6c079302a4c01db7017a36fc
        with:
          task-definition: $
          container-name: $
          image: $

      - name: Deploy Amazon ECS task definition
        uses: aws-actions/amazon-ecs-deploy-task-definition@df9643053eda01f169e64a0e60233aacca83799a
        with:
          task-definition: $
          service: $
          cluster: $
          wait-for-service-stability: true
Here is the complete aws.yml file:
name: Deploy to Amazon ECS

on:
  push:
    branches:
      - main

env:
  AWS_REGION: us-east-1
  ECR_REPOSITORY: tempo
  ECS_SERVICE: tempo-backend-service             # name of the service
  ECS_CLUSTER: TempoCluster                      # name of the cluster
  ECS_TASK_DEFINITION: .aws/task-definition.json # path of the JSON task definition
  CONTAINER_NAME: "tempo"                        # name of the container name in the task definition

jobs:
  deploy:
    name: Deploy
    runs-on: ubuntu-latest
    environment: development # this might have to be "production"

    steps:
      - name: Checkout
        uses: actions/checkout@v4

      - name: Set up JDK 21
        uses: actions/setup-java@v3
        with:
          distribution: 'temurin'
          java-version: '21'

      - name: Cache Maven dependencies
        uses: actions/cache@v3
        with:
          path: ~/.m2
          key: $-m2-$
          restore-keys: |
            $-m2

      - name: Build with Maven
        run: mvn clean package -DskipTests

      - name: Configure AWS credentials
        uses: aws-actions/configure-aws-credentials@0e613a0980cbf65ed5b322eb7a1e075d28913a83
        with:
          aws-access-key-id: $
          aws-secret-access-key: $
          aws-region: $

      - name: Login to Amazon ECR
        id: login-ecr
        uses: aws-actions/amazon-ecr-login@62f4f872db3836360b72999f4b87f1ff13310f3a

      - name: Build, tag, and push image to Amazon ECR
        id: build-image
        env:
          ECR_REGISTRY: $
          IMAGE_TAG: $
        run: |
          # Build a docker container and
          # push it to ECR so that it can
          # be deployed to ECS.
          docker build -t $ECR_REGISTRY/$ECR_REPOSITORY:$IMAGE_TAG .
          docker push $ECR_REGISTRY/$ECR_REPOSITORY:$IMAGE_TAG
          echo "image=$ECR_REGISTRY/$ECR_REPOSITORY:$IMAGE_TAG" >> $GITHUB_OUTPUT

      - name: Fill in the new image ID in the Amazon ECS task definition
        id: task-def
        uses: aws-actions/amazon-ecs-render-task-definition@c804dfbdd57f713b6c079302a4c01db7017a36fc
        with:
          task-definition: $
          container-name: $
          image: $

      - name: Deploy Amazon ECS task definition
        uses: aws-actions/amazon-ecs-deploy-task-definition@df9643053eda01f169e64a0e60233aacca83799a
        with:
          task-definition: $
          service: $
          cluster: $
          wait-for-service-stability: true
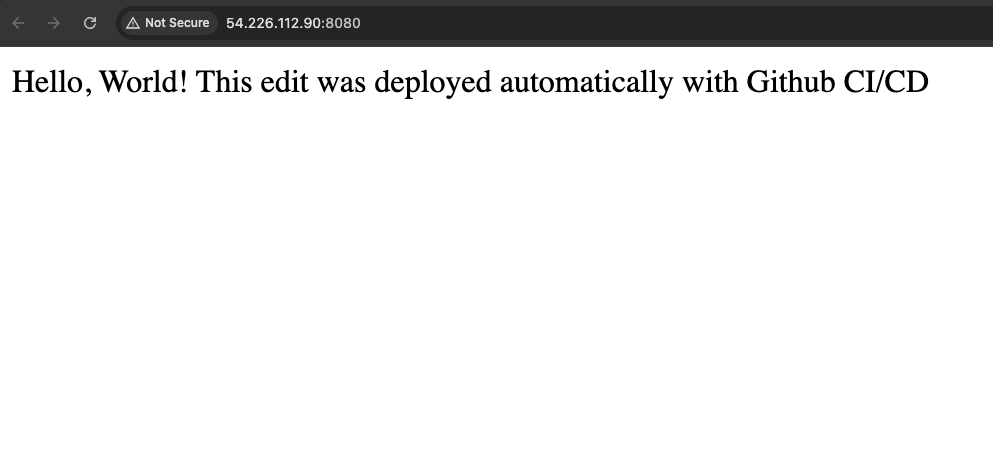
Commit changes and push to the repository. Once, the jobs execute we can navigate to ECS again, find the new public IP of the LATEST task revision and check that the application has been updated.
January 26, 2025
Adding a Load Balancer
Now we want to add a Load Balancer to the ECS service so that we don’t have to manually update the public IP of the LATEST task revision.
Resources:
- Setup Application Load Balancer and Point to ECS Deploy to AWS ECS Fargate with Load Balancer
- Amazon Elastic Container Service ECS with a Load Balancer
- Deploy Backend Application to AWS ECS with Application Load Balancer Step by Step Guide Part 3
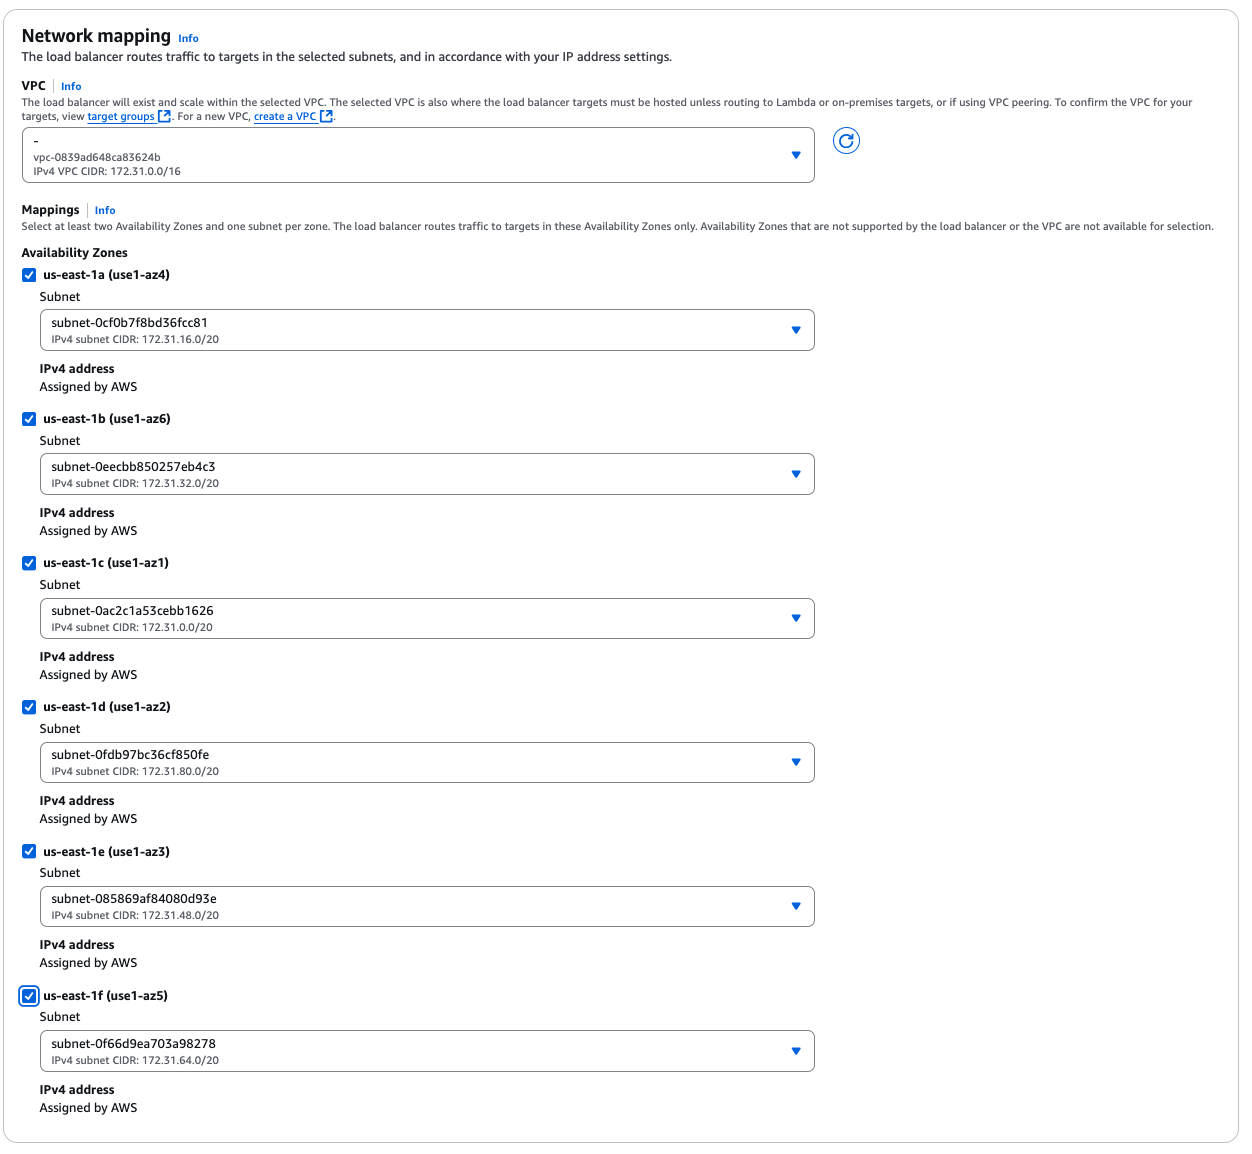
- Go to EC2 console and click on Load Balancers on the left, Create Load Balancer
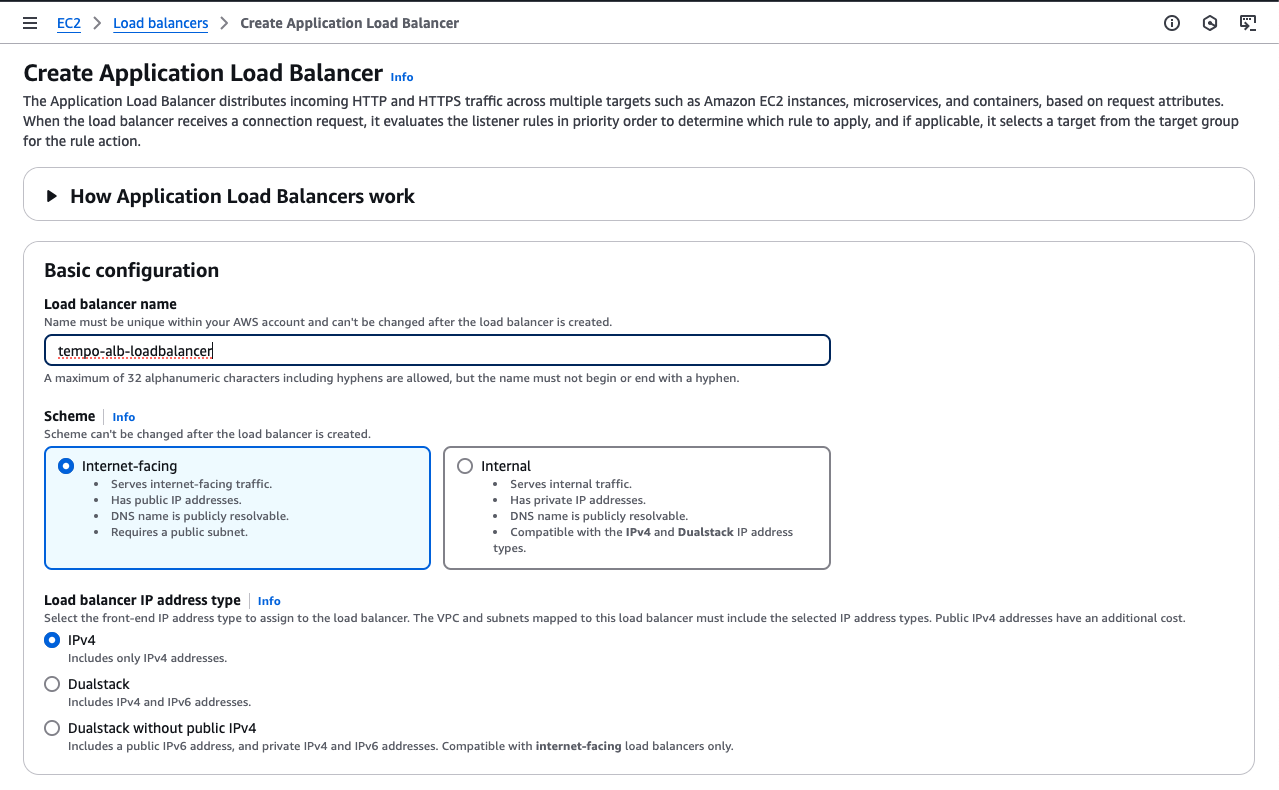
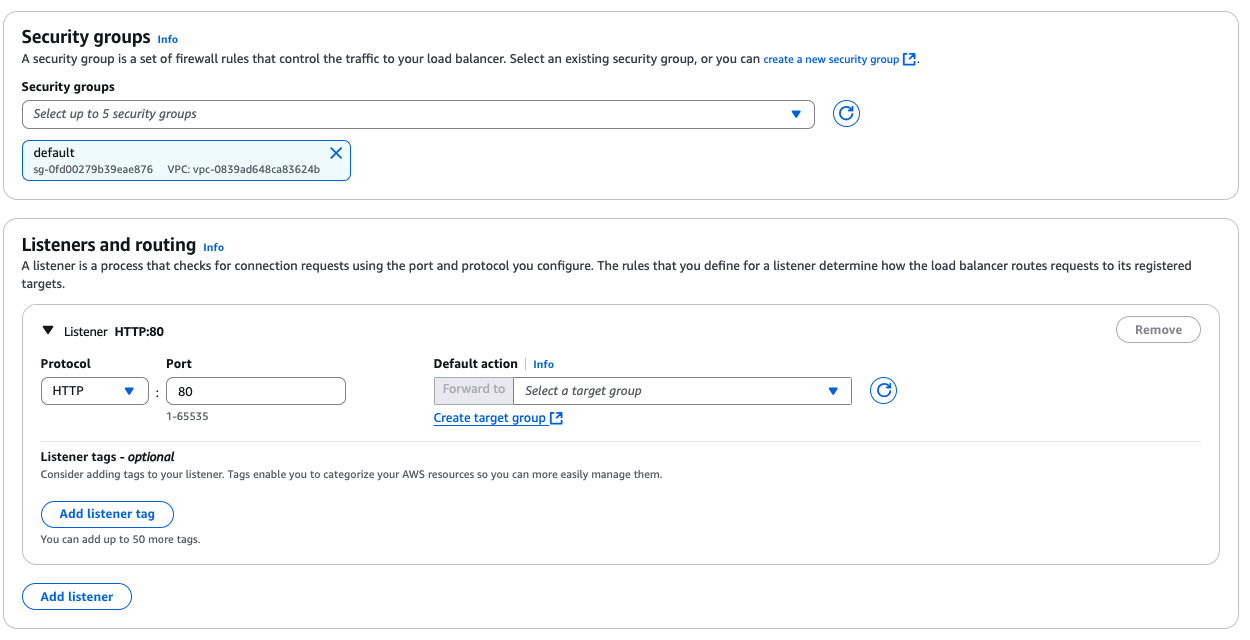
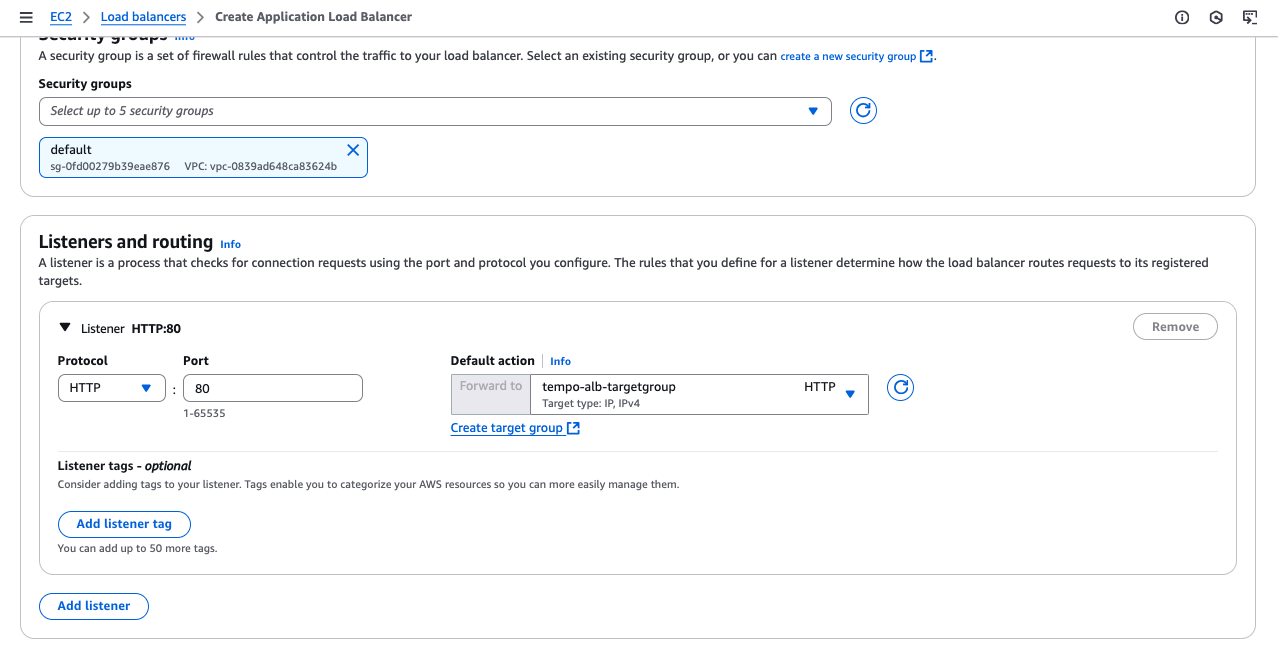
Note I had to change 80 to 8080 since that is the port my backend is forwarding to.
Next click Create New Target Group:
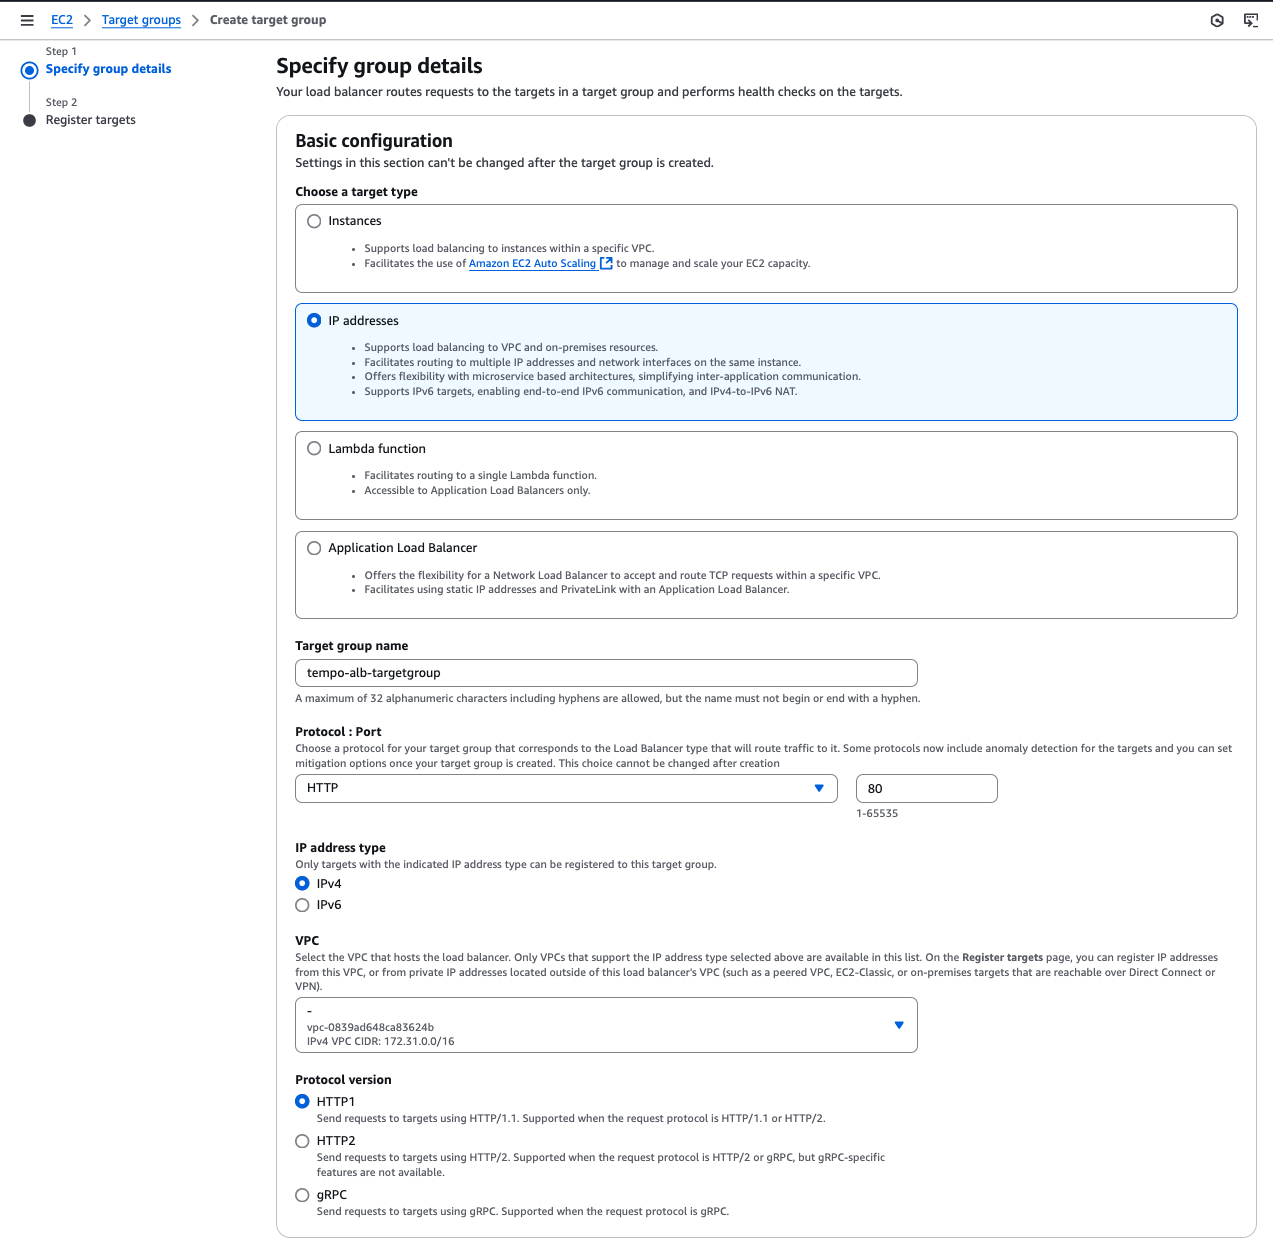
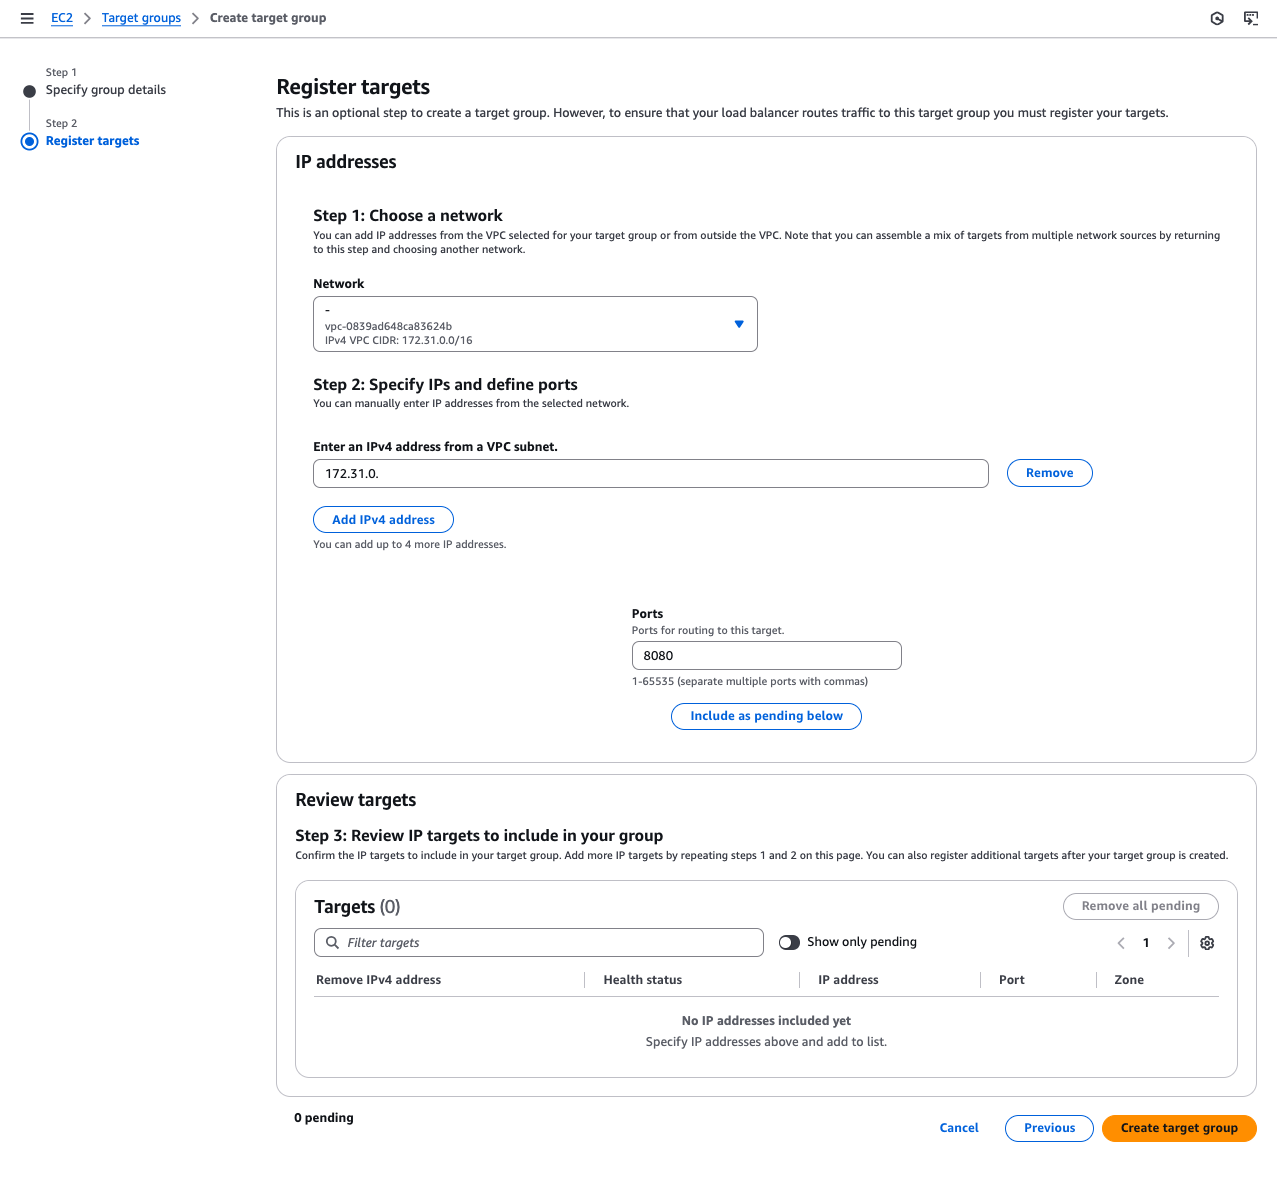
And add it to the Application Load Balancer:
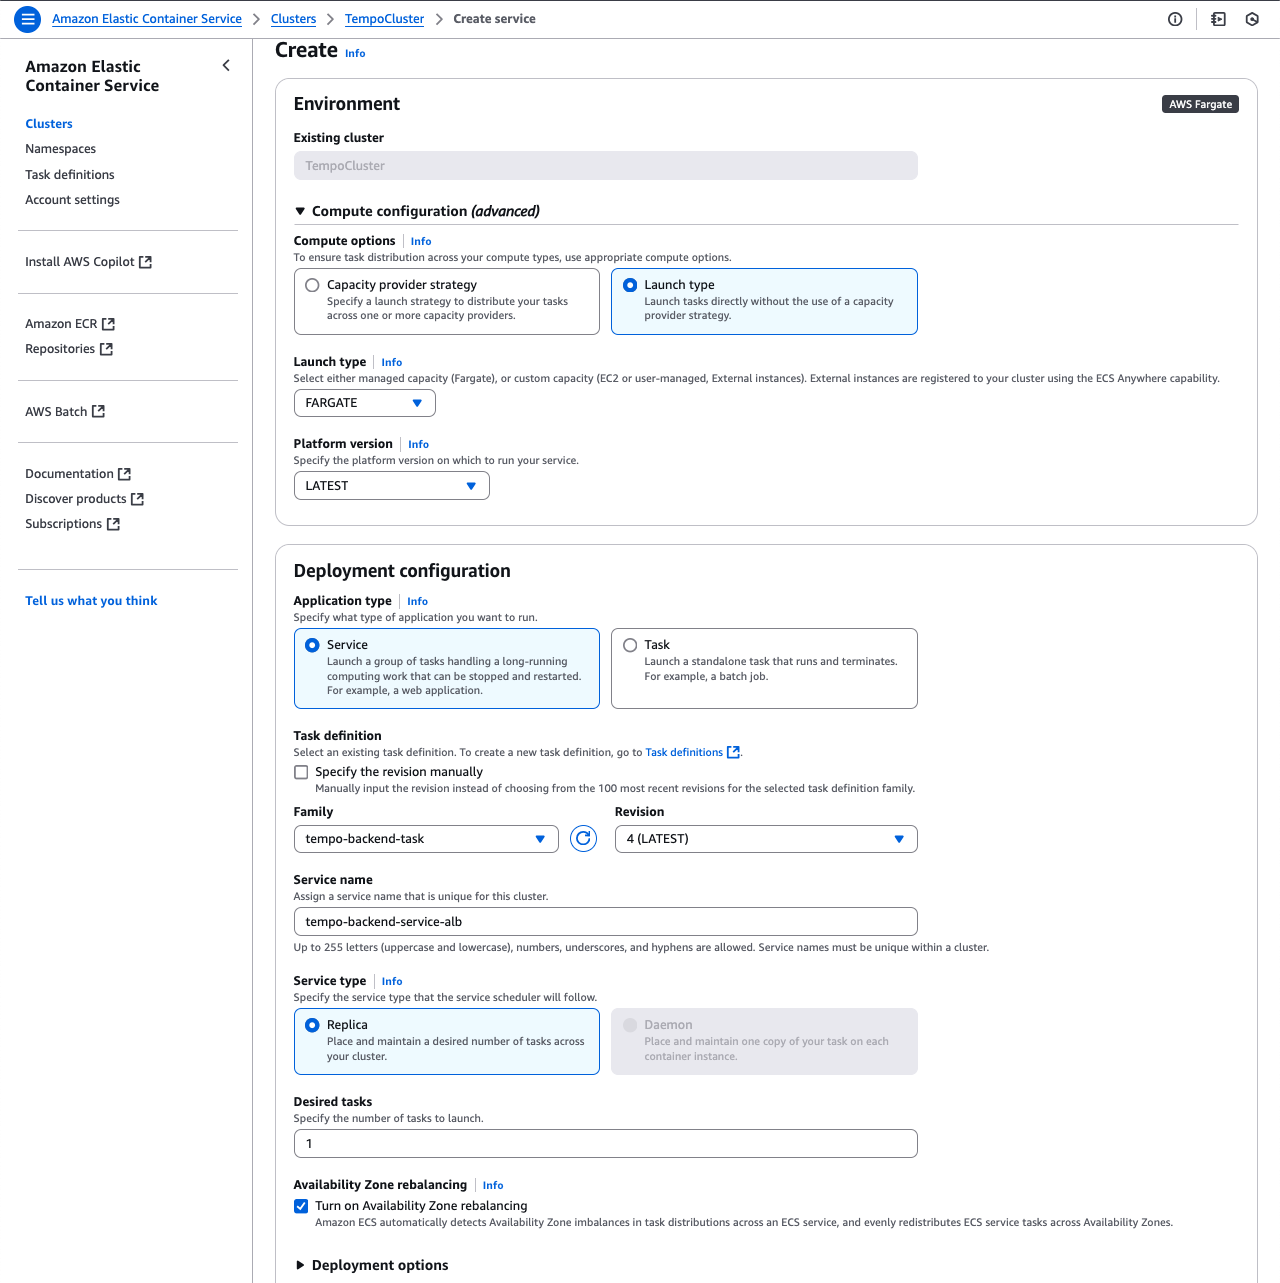
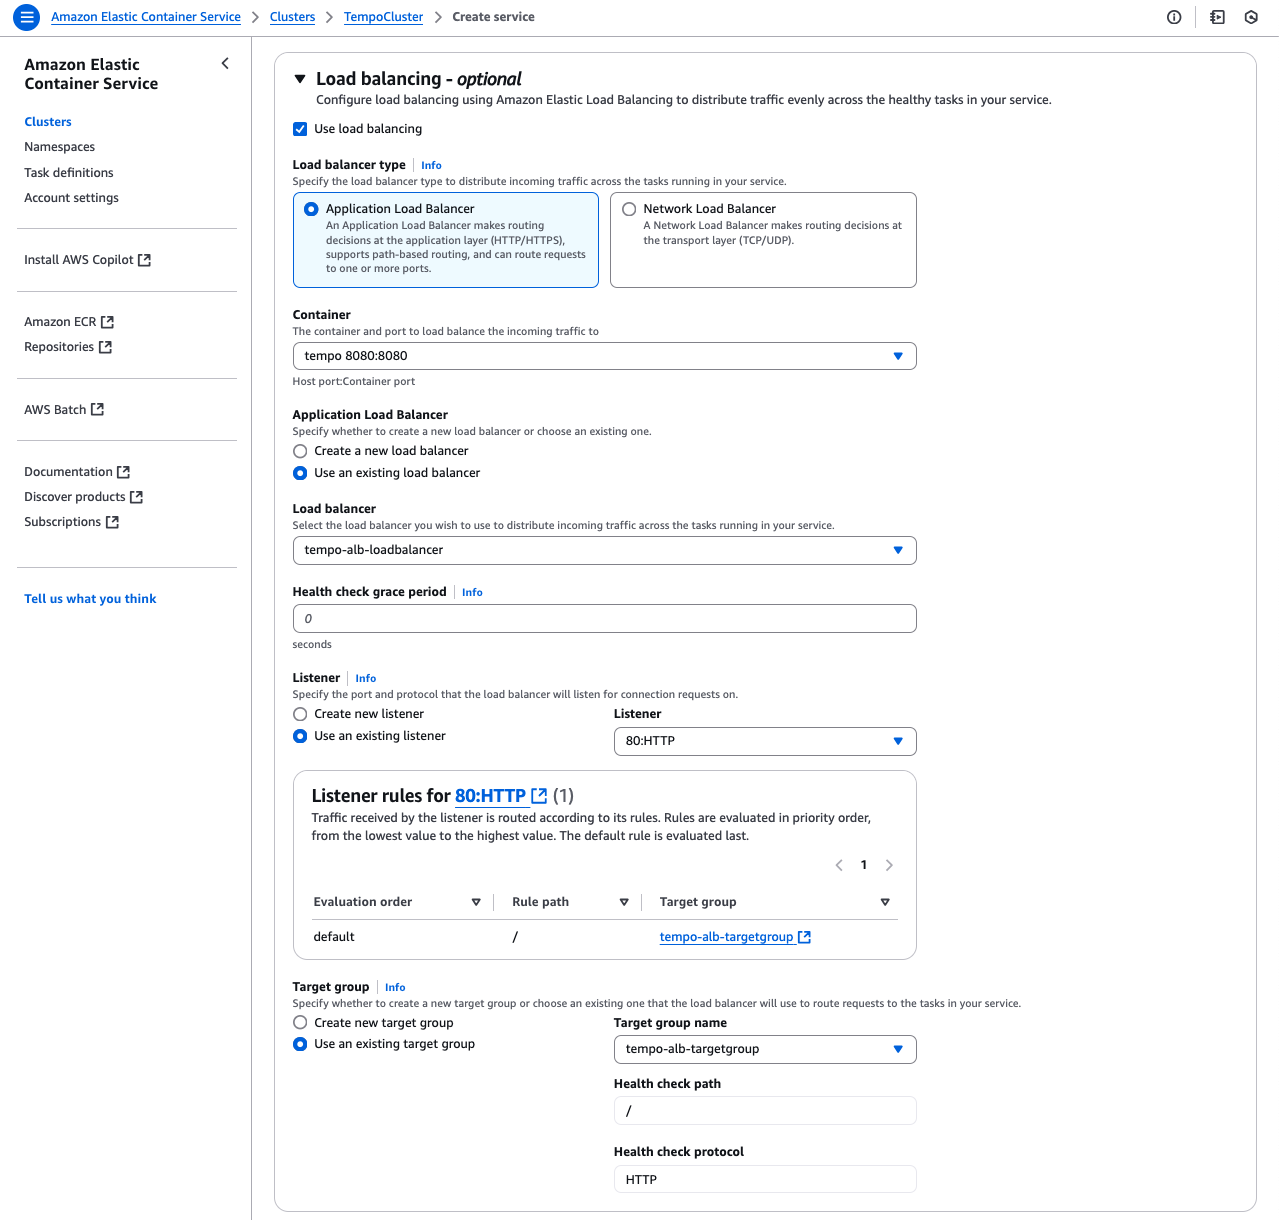
Unfortunately an existing service cannot be updated to configure load balancing, so create a new service same as before but this time select Load Balancing:
Once the task is running on the new service you can go to the the load balancer page on EC2, select your service and click on the DNS name, and add :8080 to the end of the URL.
Make sure to update your github workflow file to use the new service.